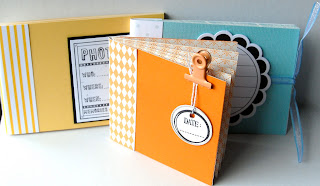
I started with these 5 notecards and a piece of decorative paper for the spine.
Open the cards, line them up right next to each other with no gaps and using a piece of tape, adhere one to the other.
You'll end up with a long line of adhered cards that when folded, will look like this.
See how there is a front cover and a back cover? You want to put adhesive on the inside cards so that they form pages, like this-
That's basically your book! You can leave the covers the color that they are, you can stamp them, add a photo on the front or you can add a piece of cardstock like I did by just measuring your cover. You'll also want to cover the spine by cutting a decorative piece of paper and wrapping it around.
The yellow and blue books used notecards that were a smaller size at 5 1/8" x 3 5/8". For the orange book, I just cut the notecards to measure approximately 4"x4". You can definitely use standard A2 sized notecards as is or also cut them down to size. It's a quick and easy way to make a cute mini book.


We've named you for the Stylish blogger award. Enjoy!!
ReplyDeleteAll right Sheila!!Wow - Stylish Blogger Award - love it!
ReplyDeleteWhat a simple idea, but the end results are fab!