Showing posts with label Tutorials. Show all posts

Monday, March 6

Simon Says: Make Your Own Background!


Hello Monday! We have a brand new challenge for you this week at Simon Says Stamp Monday Challenge - Make Your Own Background! We are showcasing Dylusions products this week, and we would love to have you use them if you have them too! Otherwise, make your background with what you have on hand. 

March also means we have a brand new Guest Designer with us for the month! Let's give Linda at heARTfully inspired a very warm welcome!!


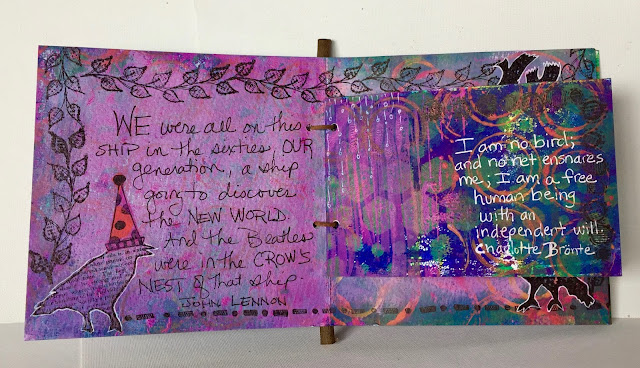
I made a little mini book from scratch using lots of Dylusions paints, sprays, some stamps and stencils. Love the bright colors Dyan Reaveley comes up with! It's bird themed, and then I looked up bird quotes to fill it with.  

To create my backgrounds, I used my gelli plate, and I made a mini movie/tutorial to show you how I did it. 


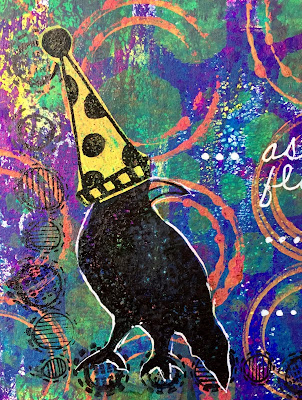
I stamped the birds' party hats on the tissue/deli wrap I had made.


Closeup details...the white pen really adds a pop, and the Simon Says Stamp Premium Dye Ink gives a semi embossed look to the stamping!


And, here are the photos of the book!


I bound the book by punching two holes near the top and the bottom of the book, (I had to be sure to come down a ways in order to catch my smaller sheet.) Then, I laced some leather through and tied it around a stick...birds, trees...I thought it appropriate! 


I had a lot of fun working with these brilliant colors and fun images. If you haven't tried printing with a gelli plate, I would encourage you to give it a try. It's a great way to create your own papers for projects! 

I hope you will join our challenge this week - I look forward to seeing what you share! Have a great week and stay crafting! 

Simon Says Stamp is giving away a $50 voucher to one lucky participant! 


SUPPLIES:


Simon is on Instagram! use #sssmchallenge


Be sure to head on over to the challenge and get totally inspired for the week with the awesome backgrounds our design team has created! 


A great place to shop!!


Monday, April 11

April Showers Bring May Flowers


 Hello Monday and hello friends!


April Showers bring May Flowers! Just remember, the showers just might be snow, like I had while working on this! I am looking forward to seeing how you interpret this week's challenge.

After a variety of ideas of what I wanted to create, I settled on making a journal from scratch - I was thinking of a garden journal where notes would be jotted down, sketches made, photos inserted...I love the idea, but am not sure if I am organized enough to use it! LOL!

All I started with were two manila folders that I cut and rounded the edges, then gessoed.


Love this organic texture I got when I layered the paint on both sides, fairly generously, then closed the folder and opened it again. It looks like the veins on leaves to me, which is perfect for my garden idea. 


Time to mix a few colors and get some fantastic results.


And here is how I did it...on one side of the folder, I squirted on the colors in a random way.


Then, I took an old credit card and swiped across in a couple of directions. I set up a plastic bag to paint on since I was getting so messy.


Close the folder, smooth over it with your hands, then open, to see your beautiful colors and textures.


I decided to add in some watercolor sheets for notes and sketching, and very lightly stenciled them.  The cover was so much fun! I painted the base layer in the green, white and blue, then stenciled the clouds with distress ink, and the umbrella and flower. Next I stamped the darling image from Stamping Bella, and colored her with distress crayons.


I bound my mini album together with waxed thread and a stick.


Here's the back...


A view showing the pages...


And for the grand finale...here's a little video showing the whole book!


Personally, I can't wait for spring to get here!! I am ready for the green, getting out onto the deck, digging in the dirt, planting the gardens...you get the picture! I will take some rain to get those May flowers!
I hope you join us in this fun challenge, and I am looking forward to seeing how you interpret our theme. 


Simon Says Stamp is offering a generous $50 voucher for this challenge!

SUPPLIES:
Journal stamp by Stampers Anonymous (old one from the stash)


A great place to shop!!


Simon is on Instagram!


How will my awesome teamies interpret this week's challenge? Head on over and soak up their creative twist on this one!


Friday, May 1

Eyes Tested!


It's challenge time at SanDee and Amelie's Steampunk Challenges, so be sure to head over to see all of the fantastic projects by the design team, ready to awe and inspire you! It's all about goggles, glasses, monocles and eye charts, so please join in the fun with us! It's a great way to use your imagination, be recognized, and the Retro Kraft Shop is generously donating a prize!

I am excited about this challenge, because it is perfect for me to take these black plastic goggles, and transform them.

First step, paint them up! I used Dina Wakely's Umber (undercoat) and Penny (sponged on top) paints.

Next, I sponged on the DW Gilt paint, and I am loving how metallic these are starting to look! I find my pieces look best when I use several paints.

Working on my metallic look, I dabbed in some metallic green Lumiere paint, and Stream and Wild Plum Adirondack paints. Once again, I find I have reached for my go to colors of green, blue and purple.

Goop on some of Finnabair's Copper Crackle with a palette knife, in just a a few places, and time to let it dry overnight. I went over these areas with dark brown ink to bring out the crackle.

Working with the Eyes Tested theme, my Tim Holtz stencil is perfect to stencil in some parts of the eye chart with black ink.

Here's some of the stenciling detail...

At this point, my goggle base is done, and now it is playtime in Steampunk land. I dug through my stash and added pieces as I worked. I decided to use Rhino Glue to attach the pieces, as it has a very strong bond. (You just have to be really careful, because it instantly bonds your skin too)

In all its finished glory, from many angles...


I talked my son into modeling them, so you can see them in action. He mentioned one of the guys he downhill bike races with has some goggles like these...perhaps there will be two this season?

Put the goggles on and let your imagination fly...perhaps you are an airship captain of a pirate ship, or racing down the road on your velocycle, or building a small automaton in the laboratory...these Steampunk goggles will transport you into another world!

I hope the DT has inspired you to join us for the Eyes Tested challenge, I'll have my goggles on looking for your take!


LinkWithin

Related Posts Plugin for WordPress, Blogger...

Pinterest