
Showing posts with label Big Picture. Show all posts
Showing posts with label Big Picture. Show all posts
Wednesday, September 5
Big Idea Festival
The big top is up and the fun has started over at Big Picture Classes! Come join Sheila and Maura at this free event, and have some creative fun! It runs through September 17. Hope to see you at the circus.

Tuesday, May 15
Starting Mom's Album

It has taken me quite awhile to start this memory book of our mother, but I finally started last weekend. I have a lot of the photos from her life, and started by sorting them into "themes" - childhood, young woman, marriage, family, friends...so that I could design the pages around the themes. I found this much easier, since I do not know who all the people in the photos are, or dates and ages.

I really enjoyed working with the old photos from when she was a very young girl. I also really liked the sepia and black and white photos. I think they will give a feel of the different years as I move from them into color.

Here is the two page layout. I am using kits to put the pages together, so it will all coordinate, and I am trying to use the vintage look for the oldest photos, and match papers to the decades. These two pages are tied together with the lace trim and accents.
I am not sure yet if I am completely done, or if I will go back in with some stamps or masks. or....so, if you have any suggestions for me, post a comment and let me know what might add to this.
Thanks!
Sunday, April 22
BPC Week 11 Earth Day Challenge

Layout I created for an Earth Day challenge in my Big Picture Class today. I came across some photos of my son discovering a caterpillar in our backyard - seemed just right to celebrate Earth Day. I stamped the background and misted it. Next I cut scraps into banner shapes and figured out how I wanted to lay them out. Photos came next and I matted one to stand out. Then, to finish the layout, I added some journaling cards, a bingo card, some words, butterflies, and a strip of corrugated cardboard.
Note: You may have noticed that I do not scrapbook chronologically. I think this is because I started to scrapbook when my sons were pretty much grown, and it was way too overwhelming to think about going back and making layouts from babyhood on. Instead, I work with photos that catch my attention, and don't worry about the order of the years.
Happy Earth Day!
Tuesday, April 10
Week 8 & 9 BPC

This is the layout I created for my Big Picture Class that combines weeks 8 - fabrics and week 9 - die cuts. I always wanted to do something with these photos of the coolest house I have ever seen. (It's in Cincinnati.) I used masks in the background (dots), fiber, strips of fabric from a sample book, die cut tabs, and the sign, washi tape, netting on paperclips, and a bit of faux sewing.
Friday, March 30
Week 7: BPC class
I've been working on this project for several weeks now for my Big Picture Class, and thought I would share some of the steps that I went through to create this.
I started out with an 8 x 12 canvas. I glued some items on to it to give it some depth - corrugated cardboard, chipboard gears, and a couple of tags.
Next, I applied a couple of old receipts with some gel medium and let everything dry. I did find with this project that I often had to let things dry overnight before moving on to the next step.
Then, I applied a thin layer of gesso over the canvas and let that dry again.
Now, the fun begins! All I really did was play with paints (purple and blue) and distress stains (tea dye), then went in with some molding paste and worked on adding some more texture to the canvas. The paste picked up the colors I was working with. Again, I let it dry overnight.
I also wanted to experiment a bit with inks, and went in with purple, blue, green and metallic. I dripped it on and let it run to get the effect I was looking for, and let it dry once again.
Next I went in with some stamps and StazOn ink and added a few images to the background, and adhered some postage stamps. I decided to add some clear crackle paint over some of the images for more texture. and...can you guess, let it dry overnight!
Finally approaching the end! I laid my image out on the canvas and played with where I wanted to put everything - flowers, gears, words, etc. before I glued anything down. I had fun mixing flowers with gears and antique buttons, and decided to add some to the lady, along with a bustle and feathers on the wings. Oooh, such fun!
And there you have it...the creation of my SteamPunk Lady!
 |
| Step 1 - adding a few items |
 |
| Step 2 - seal all areas with gel medium |
Then, I applied a thin layer of gesso over the canvas and let that dry again.
 |
| Step 3 - apply a thin layer of gesso |
I also wanted to experiment a bit with inks, and went in with purple, blue, green and metallic. I dripped it on and let it run to get the effect I was looking for, and let it dry once again.
 |
| Step 4 - add paints, molding paste and inks |
Finally approaching the end! I laid my image out on the canvas and played with where I wanted to put everything - flowers, gears, words, etc. before I glued anything down. I had fun mixing flowers with gears and antique buttons, and decided to add some to the lady, along with a bustle and feathers on the wings. Oooh, such fun!
And there you have it...the creation of my SteamPunk Lady!
 |
| Voila! My finished "SteamPunk" canvas! |
Wednesday, March 21
Week 6 BPC class

This past Saturday, my Big Picture Class held an impromptu on-line crop to celebrate our midpoint in the course. This was the first on-line crop I "attended" so I did not really know what to expect or what to do. Well, I think I picked it up pretty quickly. We posted messages, had challenges, put our work up in the gallery, won prizes (YES, I did!) and had a lot of fun! I worked on several projects, and wanted to share my week 6 layout that I call "Alien Lunch". My husband and I took a little road trip and had lunch at a diner in the midst of the UFO area of the east - Pine Bush, NY. It was a lot of fun, and I wanted a playful layout, and I wanted to try as many of the techniques from class that I could with it. I used distress inks, spray mists, doodles, layers, paper, fabric, metal, etc.
Sometimes, you do things without really realizing it. It wasn't until I put the pages side by side, that I saw the design really does flow one page into the other. I must have had my subconscious working on that part of it!
And, a find today in my stash, was this double 12x12 clipboard - just perfect to use to photograph my pages and put them on display....could have used it yesterday, but, hey now I have it out.
Thursday, March 15
Art Journal: BPC

One of the challenges presented to us in my Big Picture Class is to work in a grid. I also had this challenge in my art journal class, so with inspiration from both sides, this is what I created in my art journal. It had felt "undone" to me, even though I thought I was done with it, and tonight I decided to go back in and work on it. Now that I have added some gears, buttons and ribbon, I feel like it is "finished". In thinking back on the process, I liked what I had, but felt it was flat. Now that it is more three dimensional, I feel it is done.
Friday, March 2
Week 4 BPC: Snow day for the teacher

What could be more perfect than a snow day at the very beginning of my week 4 class at Big Picture? I haven't done a 12 x 12 layout in quite a while, so it was fun to use to portray what I love about snow days. I am sure we teachers look forward to these just as much as our students do! The focus of the class this week is pens, so I did some journaling, drew in some lines, and the other challenge was to work with a grid, which I tried. I am hoping to play a little more in my class this weekend.
Monday, February 27
Week 3: Big Picture Class

Week 3 in my online class focuses on paints and glitter. This is the first project for the week that I shared. The page background is painted with acrylic, and then I adhered the drawing I made in my art journal class on telephone book paper. I got a little creative with my face and added the pointed ears - she looked fae to me. I wrote in the background about my fascination of the imaginary - fairies, leprechauns, elves, etc. that I have had since childhood. I finished the page by sprinkling "fairy dust" over the image. I think the glitter adds to the fairy theme.
Thursday, February 23
Week 2 continued-Big Picture Classes
Some background stamping with bubble wrap on painted pages-

My two page spread in my art journal, chock full of stamping, layered images, tag, transparencies, and an old ATC I made awhile back-

Focusing on seeing, visual images....I cut off the top of the birdcage and put it at the bottom-

Added visual images, eyes, birds, seeing through the heart-

I am liking how my collage turned out.
Sunday, February 19
Week 2: Big Picture Class
 Week 2 in my online class focuses on inks and stamping - something that I have been doing for a long time, so I thought, what can I learn that's new? Well, of course, there is always more to learn! One of the fun things with this class that I am taking is that it often reminds me of things I have that have been gathering dust, or techniques I tried long ago and have forgotten about, and this week, for me, definitely highlights that.
Years ago, I remember playing around with bubble wrap. I've had some in my craft area (usually for mailing stuff out), and thought - aha! I could use that! I cut a piece and used my tape gun to adhere it to an acrylic stamping block. Next, I took the ink pad, wiped it across the bubbles and stamped a very cool background on scrap paper first to see what it would look like, and then on the card.
 I die cut a couple of tickets, stamped them and the globe, inked them up a bit with brown, and layered these pieces. Next, I adhered some netting, overlaid it with the striped ribbon, stapled it on, and arranged the stamped images to create this card which could be sent to someone going on a journey.
Closeup of the background I stamped (blue), and the "bubble wrap stamp" (red) I made.
Now, I have more ideas to play with, like stamping with paint that I want to try, so hopefully, I will have a follow up to Week 2 to share with you.
Supplies: Tim Holtz ticket die cut and stamps, Globe stamp - Art Impressions, ribbon - Stampin Up, inks - Stampin Up Cherry Cobbler and Night of Navy
Wednesday, February 15
Week 1 Big Picture Class

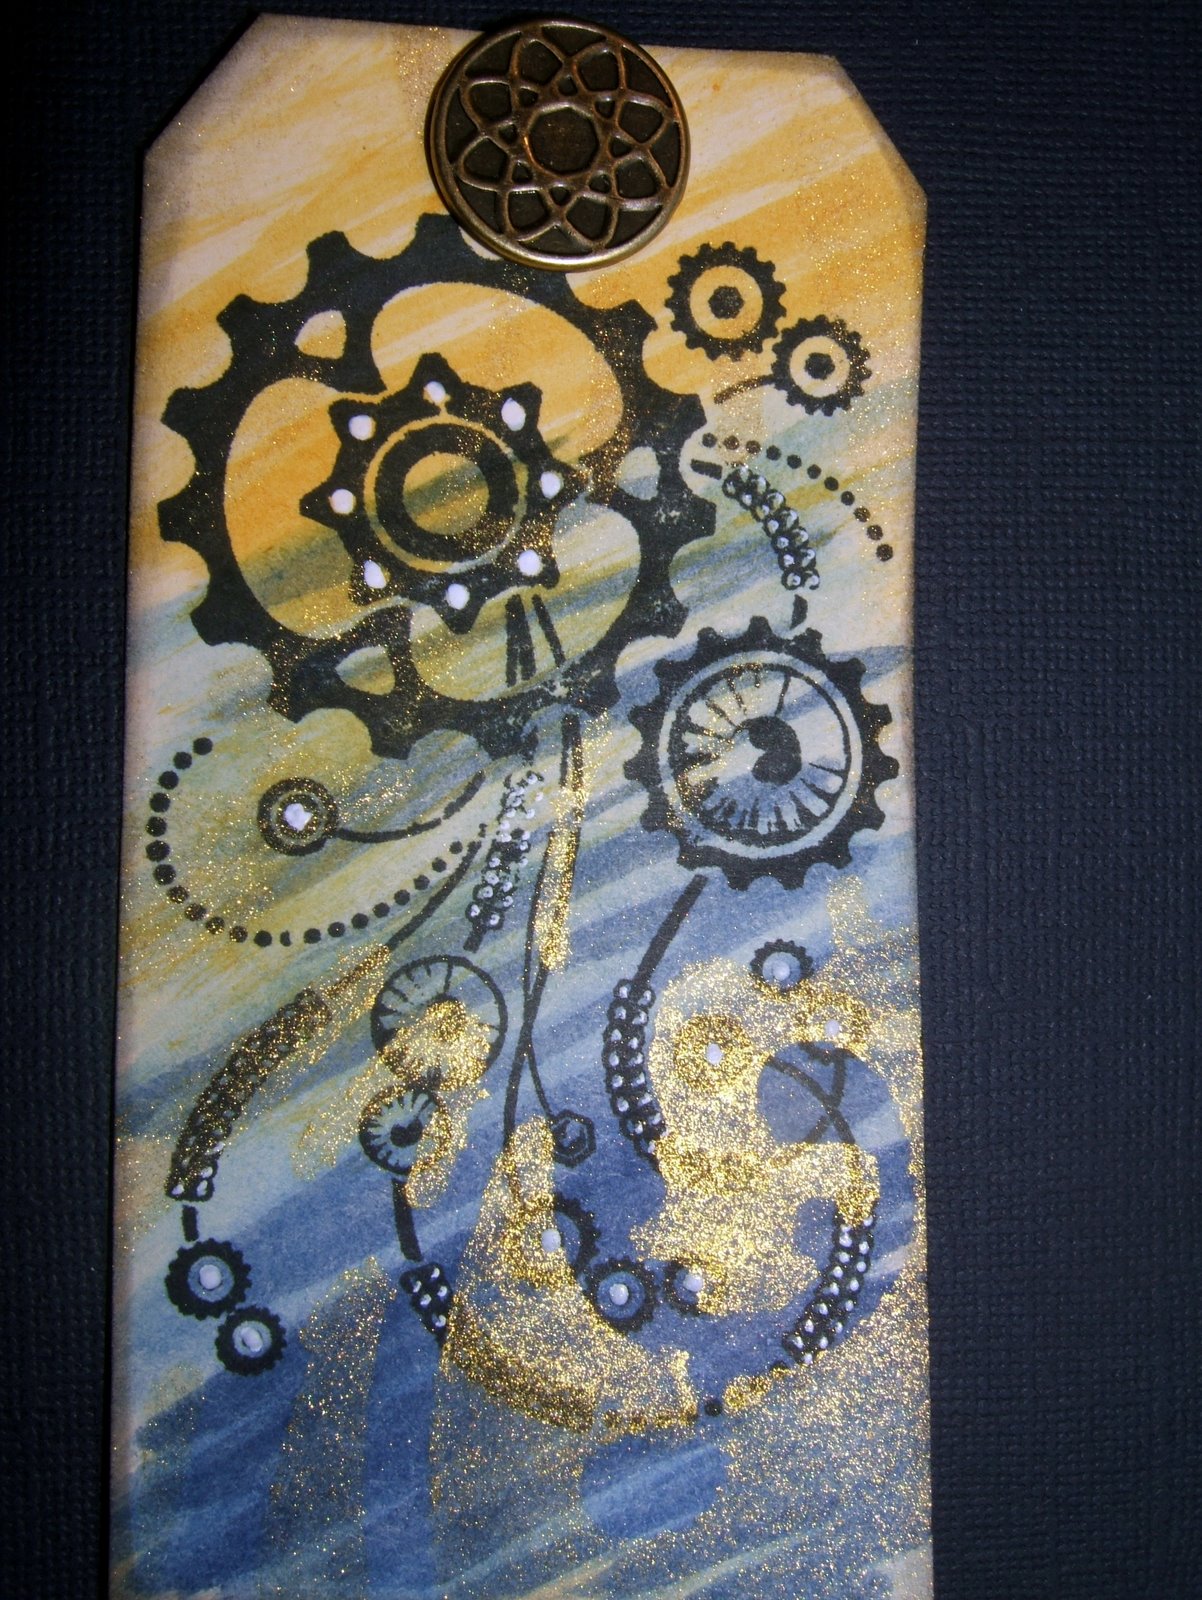
I decided to make some tags using the different techniques. May shared a cool technique where you rub your Tim Holtz distress ink on the craft sheet, add a drop of water, and it makes a cool wash. I tried this with the tags as the background layer. Found some cool stamp designs to play with, so that was the next layer. Then she challenged us to use mists and stencils, so I played with that next (the Tim Holtz compass stencil).
Added gears and a bit of white pen to the first tag.
 Liked the spray mist effect on the second tag, so stopped with that.
For my third tag, I added a gold shimmer spray, and a bit of white ink.
I had a lot of fun playing with some of my stash that I haven't used in way too long. I also really enjoyed creating the tags with one of my favorite styles - SteamPunk!

Subscribe to:
Posts (Atom)
LinkWithin
