Monday, August 5
Urban Traveler LDP Take 2
Took out the white paint and whitewashed a few areas to change it up a bit. Makes a great surface for writing on too. I love these great little wooden embellishments!
It's fun to layer on top of the page protecters too!
Keeping it simple here - just a clear overlay. Such vibrant colors in this line from Simple Stories.
Some stenciling fun, stamping, layering...
Love this page that came with all the holes, added some stamping, and over on the other side, a bit of whitewash and stamping.
I can't wait to see your take on this one, Sheila!
OK, time to get back to work.
Saturday, August 3
Long Distance Project - Urban Traveler
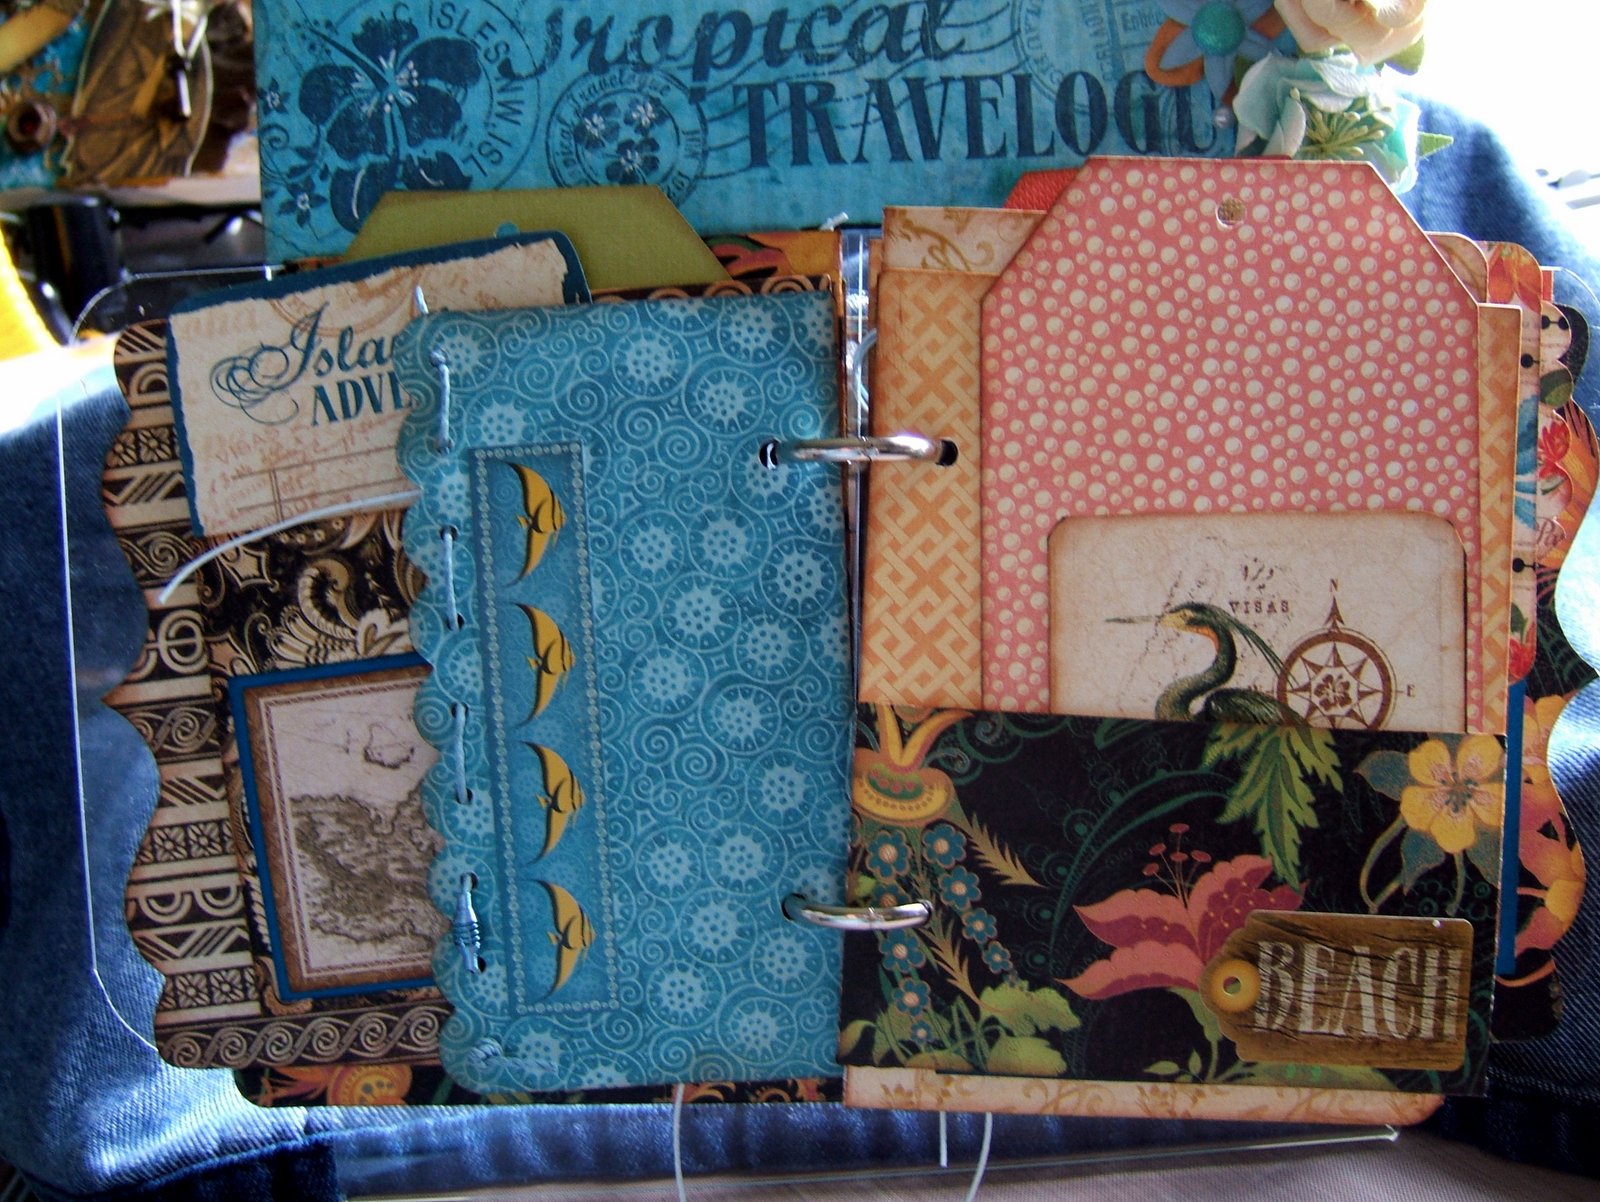
I thought I would bring you up to date on where I am with our long distance project. I used my time at the Christmas in July crop I went to recently to cut and layout all the background papers to get an idea of my layout for the album.
Next, I had fun with the Big Picture Class Pajama Party the other night, and in between trying to keep up with the chat, and watching the live feed, I did get some work done on my album.
A few rainy days (and sunny ones too), I've found some time to work a bit more on it, so here goes...finished the cover with paper, a bit of splattered paint, stenciling. popping, and stamping my steampunk balloon, fussy cutting that and layering it on - ready for adventure now!
Working on the inside and one of the dividers. I had fun stamping the dots and doodling.
Somehow, no matter how much workspace I start with, I always end up with this tiny cramped work space at the end with all the "stuff" I've been using piled around it. I try to keep it nice and neat as I go, but it just doesn't work for me...I know Sheila's workspace is tidy and neat and I do envy her ability to keep it that way. Guess I just have to accept "messy me" :) I do love my work view though, looking out at the fields and mountains in the distance.
Wednesday, July 31
Long Distance Project - it's July and I did start!
How are you doing with the project? I can't wait to see what you've been doing with our urban travel albums! Anyone else out there working on a travel album? What are you using? We'd love to hear from you!
Friday, July 5
Our next Long Distance Project
Here are our supplies that we are starting off with--the same for both of us.
Yes, I had to go with the green binder just for Maura! I might have ordered just about the whole line for us to play with, but that way we'll have a lot left over for other projects. We're going to share our progress with our mini books over the summer...so stay tuned. It will be interesting to see Maura's take on this!
Saturday, April 28
Long Distance Challenge-Maura's
I must say that I was a bit stumped when I opened the package with the challenge items in it from Sheila. But then the brain started digging for ideas. I had seen this idea of using a clear presentation board, and had some beautiful Graphic 45 papers, so I set to work. I wanted to also alter the board that the book was attached to, so it would make a nice display open or closed.
I cut the covers out of clear plastic and layered some embellishments and flowers on that. I love the look where you "peek" through and see what is coming next.
The min album is made up of all kinds of die cut page shapes, including this file folder. It's full of tags, some stamping, photo mats, embellishments....
I like the look of many different size and shape pieces in a mini album - adds a lot of interest. Pockets to include more tags, ran some hemp through a punched design, and just filled it chock full of fun stuff!
I folded a page up on the left just for something a bit different, and a bit of fussy cutting on the right with the beach sign. I really like the colors in this, so tropical feeling.
Just playing around, and decided to cut out three of the image cards and keep them connected to make a little pull out...something fun to find in the book.
Side view so you can see how it is attached and stands up on display.
I thought I would add this photo to show how I figured out where the binder clip should go. My Tim Holtz ruler worked great under the clear plastic to help me figure out where to glue the clip.
Now the mini album is ready for photos and journaling!
Thursday, April 26
Long Distance Project-Sheila's
Then I had to figure out what I was going to do with mine. I decided on a practical use.
When I finally saw the Smash books at my local craft store, I jumped on the bandwagon and bought one. And then it sat unused on my craft table for a long time. I just couldn't think of what to do with it. But I loved the size and the kraft covers so I decided to make it into an actual binder.
First I used an XActo knife and cut out the inside pages along the spine and pulled out the binding coils. I trimmed the edge of all the pages and put them in my paper stash to use in other projects.
I just used the two holes already in the spine of the book to adhere my binder clip with some nuts and bolts. I found that I didn't even need any glue. Once tightened, it held perfectly. I now had a binder!
As far as the use for my new binder....I collect recipes that I know I eventually want to make. I cut them out of magazines, people give me recipes on scraps of paper, I print them out from blogs and I stuff them all into a big clip.
Now they are nice and neat in my new binder.
I used one of the Smash papers for the inside and made labels for the different categories.
I hole punched all the recipes and put them in. I decided to keep the simple kraft covers that I like and added some thicker letter stickers. The big rubber band is an old 7Gypsies one.
I keep my new binder in the kitchen along with my other recipe books and as I try new ones, I pull them out and keep adding to it when I find more.
I'm glad that I went more practical and useful for this project, but I'm pretty sure Maura went the creative route and I'll probably want to use another one of the clips to do the same once we see her project. I can't wait to see what she came up with.
Saturday, April 21
Upcoming Long Distance Project Share
I sent a set to Maura as a surprise long distance project for us to share. No rules....just create something with them. Look for us to share a post soon with our completed projects.
Friday, October 7
Maura's Halloween Paper Bag Book
Sheila here...I love the papers that Maura chose to work with. Totally different than the clean design I lean towards, so it is always fun to see her projects in person and this paper bag book is no exception! I like that we both added transparencies but I really love all the add ons that she included on them. Totally worth the "fussy" cutting!
Love that velvet scallop edge!
You are the master of doodling. I love that added pop of the white pen. I wish I had thought to do that on my black photo mats. Need to make a note of it for next time.
I was so tempted to cut off that skeleton ribbon for myself. LOVE it and have never seen it before. Perfect addition for the theme.
I love all the texture that your book has. I can't tell you how many times I flipped a page and ran my fingers over the velvet or felt or embellishments. Your use of them throughout the book really makes it interactive. I pulled out every single insert just to make sure I wasn't missing anything!
Maura, I am so glad that you enjoyed my long distance challenge for us! I really had a lot of fun with this style of book.
Wednesday, October 5
Sheila's Halloween Paper Bag Book
Maura here - I love the effect Sheila got with the hinges - they are just so cool, and what a great idea for holding the book together!
The simplicity of the colors and designs gives Sheila's book her clean, graphic style. I love it!
The polka dot transparencies are a very cool element in this book. I like how you can peek through and see what's coming. I wouldn't have thought polka dots for Halloween, but look how well they work here.
The pennant number tags used on the tags give continuity to the design. I also like how Sheila used the staples in a creative way.
Just perfect for our books - thanks for telling me about those Sheila!
Ok, how smart are you?! You were really thinking ahead on the left page - I noticed how you stapled the words on the left and kept them free to fit right over the photo, once that is put in to place. Since neither of us had photos yet for our books, you've made it easy to add yours later!
I agree! This was a great project you came up with Sheila! I can see so many uses for this style book. Again, I love the simplicity of design, and color coordination of your book, and those hinges - awesome!!
Tuesday, September 27
Halloween Sneak Peek #1
So...here is my sneak peek (still a work in progress).
dark, rainy day = dark photo |
Now back to work.