Showing posts with label gelli plate. Show all posts

Monday, July 27

Art Journal!


Hello Monday my friends! I hope this finds you well. Yes, life is just a little crazy here, and I bet it is for you too!  This week our Simon Says Stamp Monday Challenge is ART JOURNAL. I do love to work in my art journal...or should I say, one of my many art journals.

It has been wonderful having Sheila Wy with us this month and seeing her awesome interpretations of our challenges. We will miss you Sheila, and wish you well!

Just act normal, that's crazy enough!


When I have leftover paint, I like to spread it onto extra "junk" pages to use in future projects. I started with this junk paper and built on top of this.


So, time to get out the gel plate and some bright colors. 


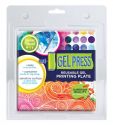
I'm using this fun printing plate and layering the design on top of the blue.


Stamping on the words...


Penciled around my patterned sheet...


Stamped around the penciled area with Simon's white ink...


Hmm...something crazy happened with this photo...

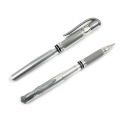
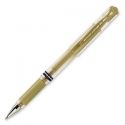
I added in some gold and white pen and sequins.


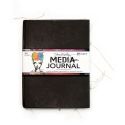
I decided to place this into my media journal, and doodle a bit on the background.


And there you go, a simple art journal page with a fun design and words. Hope you will come join us this week! Our generous friends at Simon Says Stamp are offering a $25 shopping voucher to one person selected at random. 


A GREAT place to shop!


Simon is on Instagram - use #sssmchallenge


Be sure to head on over and check out the design team's project for this week!

Tuesday, March 10

N*Studio Creative Squad - Motivated in March


Hello creative friends! I'm over at the N*Studio Creative Squad today HERE, with a bright set of cards. 


In case you missed it....

Whole Lotta Love


Happy February - the month for love of course, with Valentine’s Day smack dab in the middle! I pulled out lots of red, pink and white paint to play with, in traditional holiday colors. Originally when I started working, I was going to make cards, then that morphed into the idea of a mini album, and finally as I was putting the final touches on it, it became a Love Alphabet. Yes, you can find words from A to Z in it, all about Love and Valentines.

I started my first layer with Pyrrole Red and the Batik stencil on the gelli plate. I love stenciling in different ways - laying the stencil down and pressing the paper over it, pulling the painty stencil up and putting it down on paper, and pressing a piece of paper into the gel plate. This gives a wide variety of backgrounds to work with. I printed on both cardstock and copy paper, which later on turned out to work beautifully.


A little gold was needed as the second layer, so on some papers, I added it with the New Orleans stencil, and on others, I used the brayer.


Time for the pink layer! I added a mix of pinks over the printed papers with paint and a brayer. 


I added a final translucent layer on top with the fluid acrylics. For this layer, I just smudged the paint in with my fingers, which are great tools for blending, even if you get a bit dirty, it all comes out eventually. (Or use gloves)


Now that the background is done, it’s time for some stamping. But first, I used matte medium to glue a piece of cardstock and a piece of copy paper together. Then, I used the art foamies with white paint and repeated the pattern several times to cover the page. Once dry, I trimmed off the edges, and cut them approximately 3 1/2 x 10 1/2 inches to make my book.


Now, to make things pop, I’m stamping with black ink using X’s and O’s (remember those XXXOOO’s? - hugs and kisses). I only want the X portion of the Batik stamp, so I’ve masked off the rest with sticky notes. I’m stamping these with black archival ink.


I cut out images from a Gudrun Sjoden catalog (now, I love these because they aren’t glossy, plus they are interesting) but you can use any magazine. I also found pages with neutral backgrounds and cut hearts. Then, I looked at my junk paper I use to wipe off extra paint from the brayer, and used it to cut more hearts to glue in.


Final steps are to edge the pages with the black ink, add details with the Posca Paint pens, and write in my words. Then, I punched two holes in the center and tied it together with Sari ribbon. (I found it handy to mark the holes through all pages with an awl, then use the hole punch on each page.)


You too can make your own fun little alphabet book of love to give to that special someone. Or, it could be fun to fill it with snarky words instead! 


Sometimes I think Valentines Day is in the perfect place…all that love, giving and pinks and reds certainly brighten up the long winter around here. 
Happy Valentine’s Day to you all! Maura 


LinkWithin

Related Posts Plugin for WordPress, Blogger...

Pinterest