Hello Monday, my friends! And welcome to another week on the Simon Says Stamp Monday Challenge. Thank you for joining us for the FOOD AND DRINK Challenge and we hope you will all join us again this week too.
This week the challenge is: AT THE BEACH
You never know what treasure you may find washed up on the beach. One day a bottle shaped like a lighthouse and encrusted in barnacles, shells and treasures washed up.
My son gave me a wine bottle shaped like a lighthouse to alter. I mixed paint and vollage medium and poured it insiede to give the bottle a turquoise hu like the ocean. This took quite awhile to dry, but once done, I applied molding paste onto the bottle and embedded all the treasures - ubbles, gears, shells, beads, pebbles, etc. Again, I let that dry completely. I went over evrything with white gesso, then added paints and waxes. Final step was adding in some tiny beads glues in place with Glossy Accents.
I was inspired by the beauttiful works that Finnabair crates.
Video of the bottle showing all sides...
Photos capturing all angles of the bottle...
Details...
Lighthouse Treasure from the deep
As always Simon Says Stamp will be giving away a $25 voucher to shop at the fabulous Simon Says Stamp Store
Hello Monday, my friends! And welcome to another week on the Simon Says Stamp Monday Challenge. Thank you for joining us for the FUN WITH STENCILS Challenge and we hope you will all join us again this week too.
This week the challenge is: TIE IT UP! (Use ribbon or twine)
TRUST YOUR HEART - DANCE LIKE NOBODY'S WATCHING...
It all starts with some stamping...a fun stamp design from Lynne Perrella and my favorite black ink from Simon.
I hand lettered around the stamp with a black pen...
I decided to stencils dots around the edge of the design using Simon's Medium Dots stencil and texture paste. I'm mixing the Paper Artsy Infusions into the paste with a palette knife. Just remember, a small amount of powder goes a long ways!
I stenciled Golden Sands with the paste at the top, then worked into Orange County, finishing with Magenta. I discovered that it's rather hard to differentiate the colors once they were down, maybe due to the intensity of the powders. Let this dry completely.
Clean your stencils right away after using texture paste.
I wanted to add some Rusty Car Infusions, so spritzed the tag with water, then sprinkled some powder onto the tag. I wiped back with a baby wipe to let the dots show. I don't think I had thought ahead to how this would darken the tag, and I was disappointed that the color of the dots got lost.
Now it's time to TIE ON some hand dyed ribbon.
The hand dyed ribbon is a blend of Simon's Pawsitively Saturated Sweets and Citrine. inks.
I have a VIDEO to share with you on hand dyeing your own ribbon using Simon's inks and seam binding. ENJOY!
I added the Tim Holtz Quote Chip "TRUST YOUR HEART" to the bottom of the tag.
Well, I thought I was finished with the tag, but as so happens with me from time to time, in the night I think of a way to change it up.
I decided to stamp the image again on watercolor paper, letter around the edge, color it a bit with markers, then fussy cut and pop it up. I really struggle to work monochromatically - I have this need to add color!
Details...
TRUST YOUR HEART...Dance like nobody's watching
As always Simon Says Stamp will be giving away a $25 voucher to shop at the fabulous Simon Says Stamp Store
Hello Monday, my friends! And welcome to another week on the Simon Says Stamp Monday Challenge. Thank you for joining us for the Have a Heart Challenge and we hope you will all join us again this week too.
Please join me in welcoming back our guest designer for the month - Cassie Lynch aka mk_knits! You've seen her gorgeous work before, so get ready for lots more inspiration from Cassie.
At the beginning of each month we showcase a company, and this month it is STAMPERIA, a favorite of mine!
This week the challenge is: FUN WITH STENCILS
I came across an old kit from River City Rubber Works in my stash and thought it was perfect for this week's challenge.This is what happens when you finally clean out your craft space (well, mostly...) - you find some forgotten treasures to work with.
Also, when I saw the Coffee and Chocolate paper from Stamperia, I knew I had to get it. I do so love my coffee and chocolate!
I'VE ADDED A VIDEO AT THE BOTTOM, SO BE SURE TO CHECK IT OUT!
Starting off by scoring and folding the tags and cutting out snippets with my Simon scissors. The light tag becomes a holder for the pencil.
Stamperia has stencils that match their papers. I'm using Simon's Pawsitively Saturated Mocha ink, and one of their small blending brushes for my stenciling.
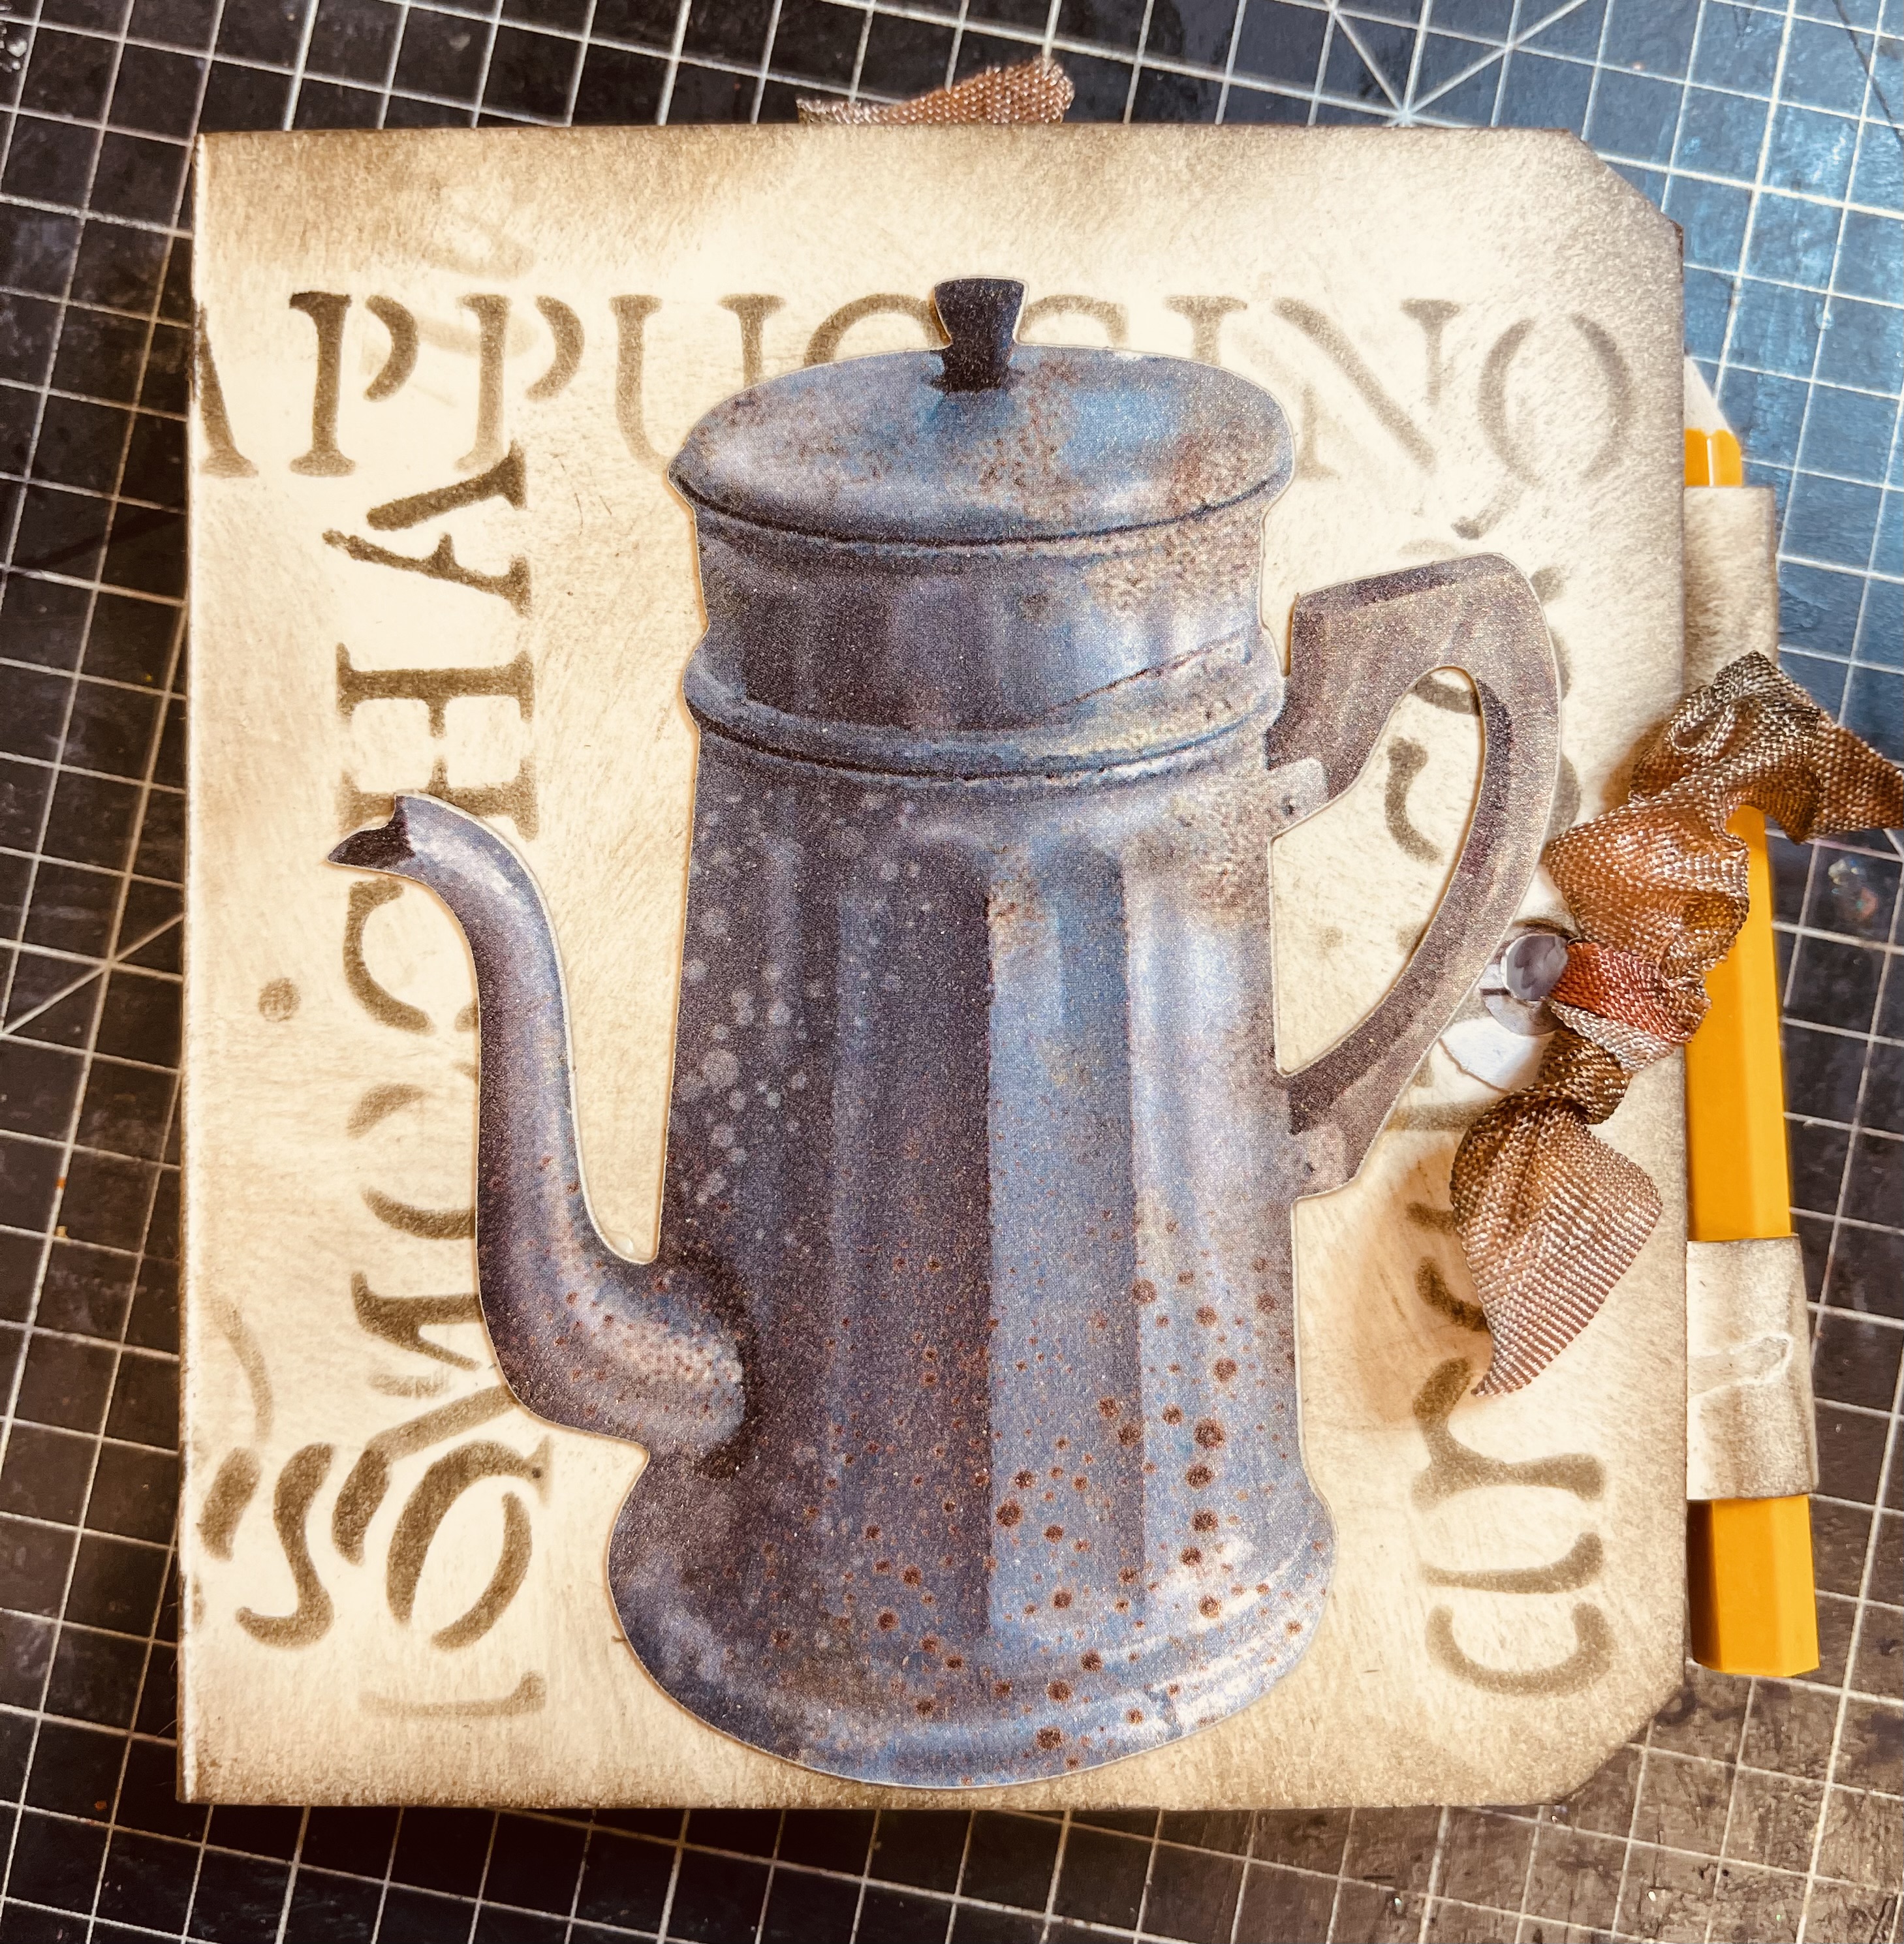
I added papers from Stamperia's Coffee and Chocolate line to the tag books, along with stenciled buts.
Outside papers...
Stenciling a tag for the front ...
....adding some hand dyed ribbon ( using the Mocha ink and seam binding), and creating a focal point for the cover. Add a stack of sticky notes inside the tag book.
Thread through more hand dyed ribbon to close the sticky note tag book.
For the second tag book, you cut a section of the tag off and into two pieces. Roll these and attach on opposite sides for the pencil.
I decided to do lots of stenciling on this one, and used both the Chocolate and Coffee stencils from Stamperia.
I added a few paper cut out embellishments from the line.
Also, I've distressed the edges of all papers and tags with the Mocha ink/
Inside with another "Latte tag" Adhere the sticky notes to the right hand side.
I added a bit of the hand dyed ribbon to the cover, and this one is held closed by the pencil.
The third book I made is a matchbook sticky note holder. I had to stencil doppio on the back, since that is my husband's favorite coffee.
Here are the backs of each of the three tag books.
Covers...
COFFEE AND CHOCOLATE TIME!
and...I've even put together a little video to take you through the tag books!
As always Simon Says Stamp will be giving away a $25 voucher to shop at the fabulous Simon Says Stamp Store